


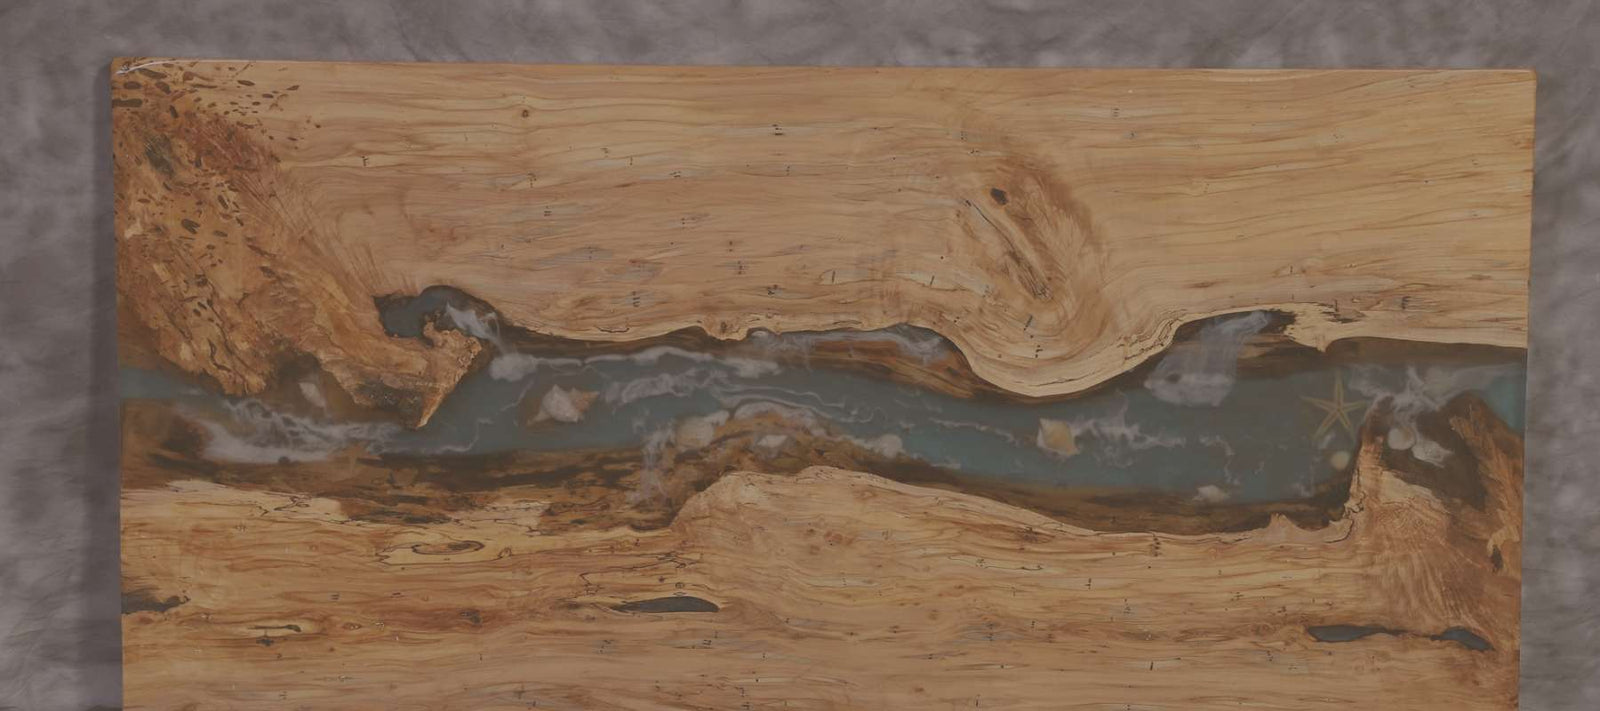

The fusion of natural wood and vibrant epoxy resin has become a popular trend in the world of furniture design. Epoxy live edge tables showcase the raw beauty of wood while incorporating a modern touch with the colorful and translucent epoxy resin. In this step-by-step guide, we'll walk you through the process of creating your own solid wood epoxy live edge table, combining the warmth of wood with the stunning visual effects of epoxy.
Before you start, gather the necessary materials and tools:
- Solid wood slab (preferably hardwood like walnut, maple, or oak)
- Epoxy resin and hardener
- Pigments or dyes for coloring the epoxy
- Sawhorses or a sturdy workbench
- Safety equipment (gloves, safety glasses, and a respirator)
- Circular saw or chainsaw
- Belt sander or hand plane
- Epoxy-friendly sealant or mold release
- Sandpaper (various grits)
- Clamps
- Blowtorch or heat gun (for removing air bubbles in the epoxy)
Step 1: Selecting the Wood Slab
Choose a high-quality solid wood slab with an interesting grain pattern and desirable live edges. Ensure the wood is properly dried to prevent warping and cracking. The thickness of the slab can vary based on personal preference.
Step 2: Preparing the Workspace
Set up a stable work surface with sawhorses or a workbench. Ensure proper ventilation, and wear safety gear, including gloves, safety glasses, and a respirator, as epoxy resin can produce fumes.
Step 3: Cutting the Live Edge
Using a circular saw or chainsaw, carefully follow the natural contour of the live edge. Take your time and make precise cuts to preserve the beauty of the wood. Smooth out any rough edges with sandpaper or a belt sander.
Tired yet? You can just buy one from us already made right here
Step 4: Sealing the Wood
Apply an epoxy-friendly sealant or mold release to the entire wood surface. This will prevent the epoxy from bonding directly to the wood and make it easier to remove any excess epoxy during the finishing process.
Step 5: Mixing and Pouring Epoxy
Follow the manufacturer's instructions to mix the epoxy resin and hardener. Add pigments or dyes to achieve the desired color. Pour the epoxy over the wood slab, making sure to spread it evenly and cover the entire surface. Use a blowtorch or heat gun to remove any air bubbles that may form.
Step 6: Creating Patterns or Designs
While the epoxy is still in its liquid state, you can create unique patterns or designs by manipulating the epoxy with tools or adding additional colors. Be creative, as this is your chance to personalize the table.
Step 7: Curing and Finishing
Allow the epoxy to cure according to the manufacturer's instructions. Once cured, sand the entire surface, starting with coarse-grit sandpaper and progressing to finer grits. This will smooth out any imperfections and create a polished finish.
Step 8: Assembling the Table
Assemble the table by attaching legs or any additional components. Use wood glue and clamps to secure the pieces together. Ensure that everything is aligned correctly, and allow the glue to dry completely.
We offer live edge bases here
Crafting a solid wood epoxy live edge table is a captivating DIY project that seamlessly combines the beauty of nature with modern design elements. By following these steps and incorporating your creativity into the process, you can create a stunning and unique piece of functional art that will be a conversation starter in any space. Enjoy the journey of bringing together wood and epoxy to craft a one-of-a-kind masterpiece for your home.


Leave a comment (all fields required)